Here is how I did it for anyone that wants to do the same, (e.g. for the 6S Plus version of the case):
- Google offer this tool for viewer manufacturers:
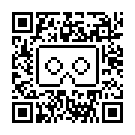
- https://vr.google.com/cardboard/viewerprofilegenerator/
- Note that I had to use Chrome in order to get the QR code at the end, (Firefox setup worked but produced a blank QR code.)
- You pair your phone via a URL displayed on that page.
- I tried Chrome for iOS but it didn't seem to work, so I went with Safari which worked just fine.
- Since this is a non-Android device there is a pop-up asking for the display density. The iPhone 6S screen is 326ppi.
- These are the settings I used:
- Company: VR Case
- Product: VR Case for iPhone 6/6S
- Button Type: Touch
- Screen to Lens Distance: 51mm
- Inter-lens Distance: 53mm
- Screen vertical alignment: Top
- Tray to lens-center distance: 39mm
- Distortion coefficients: K1 = 0.54, K2 = 0.86
Feel free to print out the code and keep a copy in your wallet, or behind the lenses or something.
As a bonus, here is my case review:
Bought this for my iPhone 6S as a replacement for a standard slim case. Really this is two products in one; a phone case and a Google Cardboard-like mobile VR viewer for iPhone. As such, I'll review it for both functions.
As a phone case it is pretty chunky; it doubles the thickness of the phone. It looks like it would provide decent protection to the phone from drops on the back and sides, but the top, bottom and front are pretty exposed. I would have liked to have seen the edges fold further around the corners onto the face of the phone to add more protection there and allow me to place my phone face down, when I'm in a meeting for example, without the screen touching the table. The hinge on the right makes it harder to hold and the volume & power buttons are harder to activate.
As a VR viewer I was surprised how well it worked actually. I tried a few cardboard demos and it worked just fine in a bright room. There is no trigger button, but you can touch the screen directly, so that was ok. The lens section doesn't lock in place when open, so you need to be a bit careful to not lean on it too hard, but stay close enough to get a good view of the screen. But it is functional and the point of it for me is to always have a cardboard viewer with me to show off some demos, while also having a fairly unique looking viewer to impress with, both of which I think this case does. The other added benefit is that since the screen is exposed it is much easier to do testing while developing VR content, since you can easily unlock the phone between builds, etc. without having to take it in/out of the Cardboard.
Overall the materials seem pretty good, with a matte-rubbery grip. The matte-silver coloured plastic areas feel a bit cheaper, with the lens covers having some scratches and the trigger release buttons not sitting flush when the lenses are locked in place on the back of the case. The lens cover buttons also add a tiny bit more thickness to the device, would may hve been better solved by putting them on the side of the lens holder.
To sum up, this isn't a great case, but is a pretty good viewer. Maybe not for everyday use, but great in the right circumstances, (like during development or going to a VR meet-up.) Still, I'll give it a try as my main case for a while and see how it lasts. There are some improvements that could be made and perhaps there is a more expensive alternative that does that, but this was less than $12, so I think the value is good.
Turns out I've kept this as my day-to-day case for about six weeks so far. If you are interested, you can buy the case now from Amazon and have it in a day!